If you own an iMac, Mac Pro, Macbook Air/Pro you are in luck. Because it is now possible to install BlueStacks for Mac (dmg file) in the lastest version for free from this page.
With BlueStacks App Player for Mac you can run your Android applications from your Mac computer using this emulator without any problem.
If you’ve always wanted to run some games or Android apps on your Mac computer and now you can do it thanks to the software BlueStacks 4 for Mac which has been designed for this purpose. You can download this software for any of your Mac computers.

BlueStacks Inc. developers have developed the BlueStacks App player which is an Android Virtualizator for various platforms such as PC or Mac. Through an advanced engineering work your computer will be able to load an Android environment like a mobile phone, Offering the ability to download and run many exclusive Android apps from the MacOS operating system.
Actually is compatible with the most of the current applications but its compatibility is not total (completely logical if we consider that there are thousands and thousands of apps) offering in any case a surprising product if we consider how different arquitectures are MacOS and Android.
In this article we will teach you the most important features and a small installation guide that will help to the most inexperienced users. The download links are below.
Installation Guide
To download Bluestacks for Mac in your MacOS operating system first you must download the .dmg file that I described above and execute it (the process takes around 1 minute).
- File name: BlueStacksInstaller.dmg
- Requisits: iMac, Mac Pro, Macbook Air/Pro (recommended after 2015)
- Languages: Multiple languages
- Licence: Freeware
- Developer: Bluestack Systems Inc.
- Official website: www.bluestacks.com
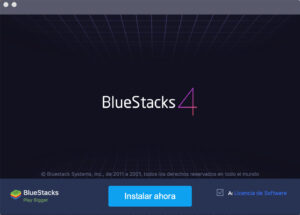
A window will open with several icons, We must to double click on the BlueStacks icon and the installation will starts. You will see a warning window about the application is downloaded from the internet so we proceed to authorize and open. Click on continue and keep the options to access the app store and communications, and press continue.
After waiting a few minutes we will be given a permission to use location that you must accept. Once this is done BlueStacks will install successfully on your Mac. Just open it and start enjoying.
Before proceeding with the installation, if you have a laptop, I recommend that you plug it into the power outlet first because the installation may require a lot of system resources, and it is not advisable to install Bluestacks 5 with power-saving mode enabled.
I also recommend that before installing Bluestacks, you update the GL Drivers of your graphics card to avoid potential error messages.
Once these requirements are met, run the downloaded file to start the installation (running as administrator).
Once the installation has started, we just need to follow the steps provided, and Bluestacks will be correctly installed on your computer. Once finished, you will only need to launch BlueStacks 5 and start enjoying it.
If any complication arises during this process, do not hesitate to write to the team in the contact section, and we will assist you as much as possible.
Installation Problems
- Compatibility Issues: BlueStacks requires a specific macOS version to work properly. If your Mac is using an older version (generally below macOS 10.12 Sierra), it may not be compatible with BlueStacks. Additionally, in some cases, Macs with Apple Silicon (M1, M2) processors may experience difficulties, although BlueStacks has released optimized versions for these chips.
- System Permissions: During installation, BlueStacks requests access to certain system settings and permissions such as enabling kernel extensions and hardware acceleration. If you don’t grant these permissions, the emulator won’t function properly or may not start. Make sure to check your system preferences and allow BlueStacks to install the necessary components.
- Virtualization Errors: Virtualization is key for BlueStacks to work on Mac. If it’s disabled on your system or the system doesn’t allow it, BlueStacks won’t run correctly. This is especially common in recent macOS versions where security policies have been tightened.
- Performance Issues: Some users may experience poor performance if their Mac doesn’t have enough resources, such as RAM or CPU power. In these cases, the program might run slowly or cause overheating. It’s recommended to close other resource-intensive applications while using BlueStacks.
Optimal BlueStacks Configuration
BlueStacks can be configured in many ways and there is no optimal configuration for all PCs, but there are certain recommended tips that you should know:
CPU: If your Mac has multiple cores, allocate at least 4 cores. For heavy games, you can assign more if your CPU allows it.
RAM: BlueStacks recommends assigning at least 4 GB of RAM. For more demanding games, you can increase this to 6 GB or 8 GB, if your PC has enough available memory.
Go to Settings > Performance and select High Performance. If you notice that this consumes a lot of resources, you can try the Balanced mode for a good balance between performance and resource usage.
OpenGL generally offers better stability and compatibility, but if your game is graphics-intensive, try DirectX for better performance. Enable ASTC Textures if your game requires advanced textures. Use the GPU Rendering option if your PC has a dedicated graphics card, as it improves fluidity and graphics quality.
For good performance without sacrificing too much graphic quality, choose a resolution of 1600×900 or 1280×720. A DPI of 240 is sufficient for most games, but you can lower it to 160 if you need to improve performance.
Make sure that virtualization (Intel or Silicon) is enabled in your BIOS. This allows BlueStacks to better utilize your CPU’s resources and is essential for performance.
If you play titles that require high FPS rates, adjust the FPS to 60 or even to 120 FPS if your monitor supports it and the game allows it. But if it’s not necessary, keeping it at 30 FPS can reduce resource consumption.
In addition to the settings in BlueStacks, optimize the graphic settings within each game. Adjust the graphics to “Low” or “Medium” if you seek to improve performance, or to “High” if your PC supports it.
Download Bluestacks for Mac
Download Bluestacks for MAC from the Official Website
Read also: If you own a PC you may be interested in install Bluestacks on PC.
I hope you find it useful!
If you have any problems with the installation do not forget to read the most common errors in bluestacks.
If you still have any doubts do not hesitate to write us in the contact section.


